Sublimation is a well-liked printing technique since it permits printing full-colour graphics on a wide range of substrates.
Unfortunately, complications may arise even when using the most advanced tools and methods.
Sublimation errors, such as a smudged picture or a misaligned print, can be challenging to rectify.
So, we’ll go over some of the most typical problems that crop up during sublimation, along with potential solutions and answer the question, “How to fix sublimation mistakes?”.
Whether you’re a seasoned pro or just getting started, these solutions will ensure that your prints look great every time.
So, How to fix Sublimation mistakes?
First of all, you’ll need some basic things to get started.
Required Supplies
- Sublimation ink
- Sublimation paper
- Heat press and sublimation printer
- The item that the mistake occurred on (such as a shirt or mug)
- Heat-resistant tape or masking tape
- Scissors or a cutting tool
- A blank sublimation transfer
Identify the mistake
The first step in fixing a sublimation mistake is to identify the problem.
Is it a smudge, smear, colour disappearance, or a misaligned print?
Knowing the problem will help you choose the right solution and learn how to fix sublimation mistakes like these.
Smudged or Smeared design:
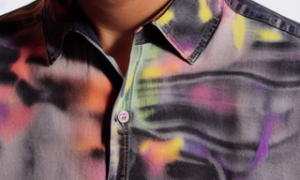
Images often become smudged or smeared due to carelessness during the sublimation process.
This may occur if too much ink or the transfer paper is not lined up correctly with the substrate.
To Cure this, first, ensure there is no dust or dirt on the material’s surface.
The next step is to position the transfer paper and press it into the material with the right amount of pressure.
You may need to experiment with a different kind of transfer paper because this will help you fix sublimation mistakes or tweak the settings on your sublimation printer if you still have smudge issues.
Misaligned Print
Misaligned printing is another typical goof-up. The material or the transfer paper may not be properly aligned, or the press may not be adequately secured, which can cause this.
Make sure the transfer paper and the fabric are levels as a first step in fixing the issue. Next, adjust the press’s clamping force or heat to hold the material.
Changing the sublimation printer’s settings or trying a different brand of transfer paper might help if the misalignment persists.
Related: 8 Best Methods to Remove Screen Printing
Discolouration
The colouration of the print is a third frequent oversight. A misalignment between the transfer paper and the substrate, or improper adjustments to the transfer’s temperature or pressure, can also cause this.
One possible solution is to check the alignment of the transfer paper and the substance.
It can help you know how to fix sublimation mistakes before getting to a different answer.
The press’s temperature and pressure must then be adjusted to transfer the image accurately.
If the discolouration persists, try switching to another brand of transfer paper or changing the settings on your sublimation printer.
Poor Design Quality
A mistake that can occur is a print that is too faded or of poor quality.
This can happen if the ink is not loaded correctly into the printer or the transfer paper is too thin.
A better quality transfer paper made for sublimation printing should be used as a first step toward correcting the issue.
Then, check that your printer’s ink cartridges are full and installed correctly.
Change the sublimation printer’s settings or try a new kind of transfer paper if the print quality is still subpar.
Ghosting
The term “ghosting” refers to the process. When a new design is put to a sublimated item, a ghost of the old pattern may remain visible.
This occurs when sublimation ink accumulates in the substrate’s pores.
Sublimation ghosting can be fixed by thoroughly cleaning the object before applying a new design.
When applying the new pattern, use less heat and time in the press.
To clean or degrease for sublimation, use a product designed for that purpose, and this can help know better how to fix sublimation mistakes.
Pre-treatment solutions can also be used to lessen the likelihood of ghosting occurring.
Applying the new design at a lower temperature and for a shorter pressing time can also help minimise ghosting.
Popular: How to Print Sublimation Images? Detailed Guide (2023)
How to fix a sublimation mistake on a tumbler?
You would be wrong if you believed you were the only one to have messed up a tumbler while sublimating.
I’ve been there, and it wasn’t the first time, so you can rest easy knowing that I’ve got your back for the common query of how to fix a sublimation mistake on a tumbler.
As I said before, identifying the problem is essential before trying to implement a remedy. I’ve addressed the most frequent issues below:
Smudging:
Smudging occurs when the ink from the sublimation transfer is smeared or smudged on the tumbler.
Fix:
You’ll need rubbing alcohol, a clean, soft cloth, and a toothbrush to remedy this.
First, take the soft cloth and dampen it with rubbing alcohol, then clean the smudged area gently.
Take care to contain the ink spill. Then, using a circular motion, scrub the area gently with the toothbrush.
It will take more tries to eradicate the smearing, but it’s worth trying than throwing it into the trash.
It’ll help you understand better how to fix a sublimation mistake on a tumbler in the future.
Misaligned image
Misaligned images occur when the sublimation transfer is not centred or aligned adequately on the tumbler.
Fix:
A heat press can fix it by applying for a new sublimation transfer.
As a first step, put the tumbler in the heat press for a few seconds to evaporate any lingering ink.
You must then realign the fresh sublimation transfer on the tumbler.
When you’re done, push the tumbler with the new transfer as directed by the manufacturer.
Also Read: How to Sublimate a Tumbler? Best Guide (2023)
Faded or low-quality image
Faded or low-quality images occur when the sublimation transfer is not pressed long enough or at the correct temperature.
Fix:
A heat press can fix it by applying for a new sublimation transfer.
As a first step, put the tumbler in the heat press for a few seconds to evaporate any lingering ink.
You must then realign the fresh sublimation transfer on the tumbler.
Finally, follow the manufacturer’s directions and push the tumbler with the new transfer for the specified duration at the specified temperature.
Uneven or patchy image
Uneven or patchy images occur when the tumbler is not heated evenly or when the transfer is not pressed onto the tumbler firmly.
Fix:
You will need a heat press and a new sublimation transfer to fix this.
First, heat the tumbler in the heat press for a few seconds to remove any residual ink.
Then, reposition the new sublimation transfer on the tumbler, ensuring it is appropriately aligned.
Finally, press the tumbler with the latest transfer firmly and evenly.
You May like: Are Sublimation Tumblers Dishwasher Safe ?
Frequently Asked Questions
Q: What are some common causes of sublimation mistakes, and how can they be prevented?
Sublimation problems are common due to improper temperature or pressure settings, improper placement of the item on the press, or incorrect sublimation paper.
To avoid these issues, it is essential to select high-quality sublimation paper and to double-check your settings and positioning before pressing.
Q: How to fix a sublimation mistake on a shirt or other piece of clothing?
To fix a sublimation mistake on a shirt or other piece of clothing, you can repress the design with the correct placement or colour. Alternatively, you can use a fabric marker or paint to correct the mistake.
Q: Is there a way to fix a sublimation mistake on a ceramic or metal item without starting over?
You don’t have to start over if you make a mistake while sublimating a ceramic or metal object.
Fixing a botched design can be as simple as covering it up with a stencil and airbrushing on the new one.
To conceal the error, you might also try using a vinyl cutter to make a brand-new pattern, which may help you better understand how to fix a sublimation mistake on a tumbler.
Q: What should I do if I notice a mistake on a sublimated tumbler after it has been pressed?
If an error is discovered after pressing a sublimated tumbler, the procedure will depend on the nature of the mistake.
Minor mistakes, such as a misaligned pattern or a smear, may be fixed by repressing the design with the correct placement or using a paint marker.
A replacement tumbler may be required if the mistake is more serious or affects the design.
Q: Is it possible to remove a sublimated design from a tumbler and start over?
Sublimated designs can be removed from a tumbler and reapplied, but the process is time-consuming and labour-intensive.
Some chemical methods exist for erasing the pattern, albeit they are risky and may damage the tumbler in the process.
Q6. How to fix a sublimation mistake on a tumbler in the first place?
Sublimating tumblers may be a tricky business, so before pressing, it’s a good idea to double-check your design’s positioning and colour settings.
The highest quality sublimation paper should be used, and the tumbler should be thoroughly cleaned and prepared before pressing.
Conclusion
Repairing errors in sublimation requires a deliberate strategy. Examine the product for flaws and double-check the sublimation conditions (time, temperature, and pressure).
Check that the image is oriented correctly and that you use the right transfer paper.
The method outlined here should help you locate the error and rectify it, resulting in a superior result.
Here I’ve covered the common sublimation errors, and I hope you got the idea of “how to fix sublimation mistakes?” and “how to fix a sublimation mistake on a tumbler?“


