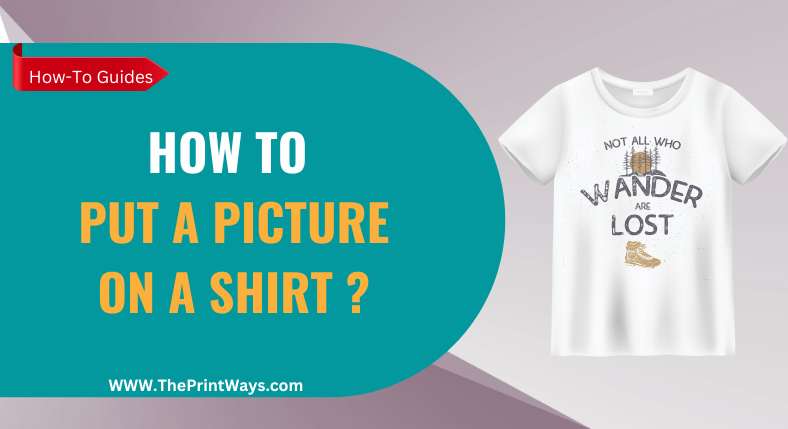
Nowadays, it’s trendy to add our own personal touch to our outfits with custom designs. Transforming a shirt into a wearable canvas is a great way to showcase memories, creativity, or make a statement.
Simply add a picture and voila! But for some people, it’s not that simple. There are a lot of talented begginers out there trying to figure out how to put a picture on a shirt but can’t get their hands on the useful info.
So, Let’s explore the process of adding a picture to a shirt with the most used and best Printing methods out there.
We’ll walk you through the tools, techniques, and important factors to achieve a beautiful and successful result.
Learn the easy steps to turn any image—from family pictures to compelling artwork to your own designs—into a custom T-shirt that you can wear with pride.
The process of transferring an image into cloth is interesting, so choose your favorite shirt and join me in exploring this technique!
What Are Some Methods That Can Be Used to Print a Picture on a Shirt?
Printing a picture on a shirt is an easy way to express your unique style. Whether you want to make a statement or create something fun and exciting, there are plenty of methods that can turn any plain T-shirt into something special.
- DTF Printing
- DTG Printing
- Sublimation Printing
- Screen Printing
- Cricut
1. DTF Printing
Creating a personalized shirt with DTF printing is easier than you think! It’s the perfect way to express yourself and make a statement. Here are four simple steps to get started:
- Get your stuff together: You will also need a heat press machine, a blank shirt, DTF powder, and a DTF printer with DTF film.
- Create or pick the image you wish to print on the shirt using graphic design tools. For optimum results, use a high-resolution version of the design.
- In order to prepare the DTF printer, the DTF film roll must be loaded into the printer and aligned. Establish a connection between your computer and the printer, and then deploy any required drivers or software.
- You may print the design by opening the file on your computer and sending it to a DTF printer. Size, color, and quality may all be modified before printing to meet your needs.
- After the design has been printed on the DTF film, the adhesive powder should be uniformly sprinkled over the whole printed area. Ensure a strong bond between the powder and the ink.
- Gently shake the DTF film to remove any loose adhesive powder. Make sure the powder doesn’t smear the printed pattern and that it’s spread out evenly.
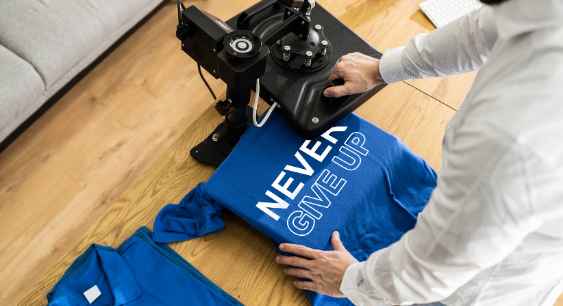
- Get your heat press ready for DTF printing by preheating it to the proper temperature and holding it there for the allotted amount of time. Position the DTF film, printed side down, onto the blank shirt, and place it on the heat press bed.
- Press firmly for the specified amount of time with the heat press closed. The ink on the DTF film will be transferred to the shirt when the adhesive is activated by heat and pressure.
- Carefully open the heat press machine and peel off the DTF film from the shirt after the transfer process is complete. The pattern should have transferred completely onto the garment before you begin peeling off the film.
- Remove the DTF film and return the printed shirt to the heat press machine for the additional recommended time to cure the print. Ink’s durability and readability are improved by this curing process.
- Don’t touch or put on the garment until it’s totally cooled down. This guarantees the print will dry completely and stay put on the cloth.
You’ll be amazed at how easy it was to create something special that no one else has! Plus, you can do all this without ever leaving the comfort of home – what could be better?
So why not start expressing yourself today by taking advantage of DTF printing? You won’t regret it!
Related Post: What Printers Can be Converted to DTF ?
2. DTG Printing
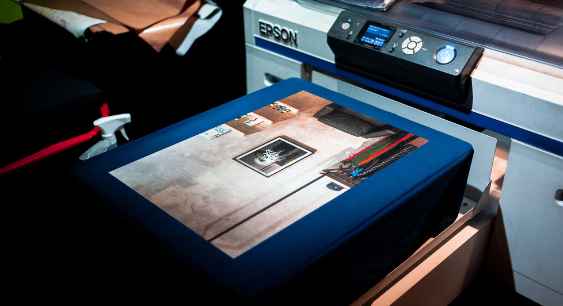
Now that you know the steps for DTF printing, let’s move on to DTG printing. This method is ideal if you want a more durable and vibrant image on your shirt. Here are the steps:
Sure, here is a step-by-step guide on how to put a picture on a shirt using DTG printing method:
1. Prepare your image
The first step is to prepare your image. The image should be high-resolution and in the correct format. The most common format for DTG printing is CMYK. You can use a photo editing software to resize and crop your image, and to adjust the colors.
2. Choose your shirt
The next step is to choose your shirt. The shirt should be made of a natural fiber, such as cotton or linen. Synthetic fibers, such as polyester, can be difficult to print on. The shirt should also be pre-washed and dried to remove any wrinkles or lint.
3. Set up your printer
Once you have your image and shirt, you need to set up your printer. DTG printers use special inks that are designed to be absorbed by natural fibers. You will also need to use a heat press to set the ink.
4. Print your image
Once your printer is set up, you can start printing your image. The printer will print the image directly onto the shirt. The printing process can take a few minutes, depending on the size of the image.
5. Set the ink
Once the image is printed, you will need to set the ink. This is done by using a heat press. The heat press will heat up the ink and make it permanent.
6. Let the shirt cool
Once the ink is set, you will need to let the shirt cool. This will take a few minutes.
The results will be stunning! You’ll have a high-quality custom shirt with your own unique artwork emblazoned across it – what better way to show off your style?
Also Read: What can DTG printers Print On?
3. Sublimation Printing
Sublimation printing is a great way to personalize and customize your clothing. Follow these simple steps to put a picture onto your shirt with sublimation!
- First, you’ll need an image that can be printed in reverse on the paper or fabric of your choice. Make sure it’s of high enough quality for transfer—300 dpi is ideal.
- Next, choose the garment you’d like to put the image on. The best results come from polyester material and some synthetic-blend fabrics. You won’t get good results if using 100% cotton as this type of fabric does not allow for dye-sublimation printing.
- Then, find a flat surface such as a hardwood board or thick cardboard and place the garment face up on top of it.
- Place the image face down over the area where you want to print it and cover with parchment paper (or other protective sheet).
- Now all that’s left is to use an iron or heat press machine at 400°F/205°C for around 1 minute depending on size of design. Check the Heat Press Temprature Chart for more better understanding about different materials.
- Afterwards, carefully remove both sheets from the backside without peeling off the image itself and voila – you have successfully transferred your own unique design onto a t-shirt!
It’s important to note that any excess ink should be washed away after pressing before wearing or storing your item. And there you have it – now enjoy wearing your one-of-a kind personalized tee!
Popular: How to Print Sublimation Images?
4. Screen Printing
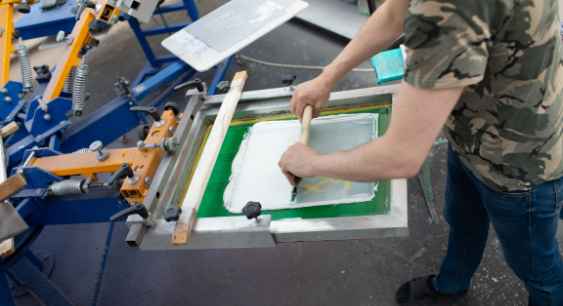
For those who want to make a more permanent statement with their shirts, screen printing is the way to go. This method of shirt customization involves pushing ink through screens that are cut into patterns and shapes.
It’s best for applying large images or designs over an entire garment. To get started, you’ll need some basic supplies like a squeegee, fabric paint, blank shirts, and a photo emulsion kit.
- First, decide what design or image you’d like to transfer onto your shirt. You can use any type of graphic file format; just be sure it has enough resolution so that it doesn’t look blurry when printed on the fabric.
- Next, prepare your emulsion sheet by coating one side with the emulsion mixture included in the kit. After this dries completely (it may take several hours), place the image against the coated surface of the sheet and expose it to light until the image transfers onto it.
- Once done, rinse off your sheet in cold water and let air dry before moving on to creating your screen mesh stencils from each transferred image piece.
- Then stretch these pieces across frames made of wood or metal and secure them tightly using clamps along the edges – this will create your “screen.”
- To print your design onto a t-shirt or other clothing item, place a separate frame underneath wherever you plan to apply ink and then fill up a plastic container with fabric paint.
- Gently spread out the paint evenly over your chosen area using a squeegee while making sure not to press too hard as this could damage both frames and material alike!
- Finally, carefully lift away excess paint from around where you’ve applied it before allowing everything time to dry properly – voila!
Now you have yourself a customized shirt featuring whatever design or picture you wanted all thanks to utilizing screen printing techniques!
You May Like: Sublimation Vs Screen Printing: Ultimate Comparison
5. Cricut
Ready to create your own custom t-shirt? With Cricut, it’s easier than you think.
- Start by gathering the materials you’ll need: a light colored t-shirt, transfer paper and inkjet printer, iron or EasyPress machine, scissors and weeding tool (optional).
- Next, design your image using Cricut Design Space and print it onto the transfer paper with an inkjet printer.
- Once printed, cut out the design from the transfer paper. You can use a pair of scissors for this but if you have access to a cutting machine like a Cricut Maker or Explore Air 2 that would make things much easier!
- Now all you need to do is place your design on the shirt. Preheat your iron or EasyPress machine according to manufacturer instructions then press down firmly for 30 seconds before peeling off the back sheet of the transfer paper.
If there are any areas that aren’t sticking properly just apply pressure again and they should be good to go! Finally, let cool completely before wearing or washing your custom t-shirt – enjoy showing off your unique creation!
Frequently Asked Questions
Q: What Type Of Shirt Should I Use?
First and foremost, keep in mind the type of material you’re using. Cotton shirts are usually best for printing designs since they absorb ink well and hold up over time.
You could also try polyester-blend fabrics such as tri-blends if you want something lightweight but durable.
For more intricate designs, go for higher quality materials like silk or linen – these will help give sharper results with less fading.
Q: How Long Will The Image Last On The Shirt?
When printing an image onto fabric like a t-shirt, it’s important to use inks that are designed specifically for this purpose. These inks have been formulated to withstand washing cycles and resist fading over time.
The best quality prints produced with these specialized inks should last up to 50 washes or more without significant degradation.
Q: Is It Possible To Print A Picture On Both The Front And Back Of A Shirt?
Let’s break this down. If you have access to a printer that prints onto fabric or T-shirts, then yes – you’ll definitely be able to print pictures on both sides of your item.
There are also several online stores which offer custom services when it comes to putting images onto clothing items.
These options will cost more than if you were just using a standard inkjet printer at home, but they’re worth considering if you want something unique.
Conclusion
In conclusion, printing a picture onto a shirt is an easy and affordable way to express yourself. The best type of shirt to use for this project is one made from 100% cotton or polyester.
It’s important to choose images that are created in high resolution so they will last for many wears without fading. Depending on the size and number of shirts you’re making, it can cost anywhere from under $10 up to several hundred dollars per shirt.
And if you really want to make a statement with your design, you can always print it on both the front and back! So why not take advantage of this fun DIY opportunity and create something special? You won’t regret it!